Feeling flushed
The lost art of repairing flush ells.
Flush ell-style water closets can present quite a challenge when it comes to repairing leaks between the tank and bowl. Once you get past being intimidated by their relative rarity and experience some of the tricks needed to deftly tackle these porcelain antiques, you will be a hero to the owners who desire to keep them intact.
Take a moment to study the drawing and you’ll note there are only four points where water can escape. The spud gasket, two flush ell gaskets and the tapered flush valve gasket. Well, it certainly looks simple enough to repair, doesn’t it? Looks can be deceiving! Let’s tackle this in a series of steps designed to ensure success.
Turn off the water and completely drain the tank. I know that sounds like a no-brainer, but you won’t regret taking this step if the tank becomes mobile during the course of repairs — and I’ve had that happen more than once. While you’re sponging or siphoning off the remaining water in the tank, check the bolts securing it to the wall. It’s not uncommon for these to have rusted away, leaving the tank being supported by the water supply and tank flush ell. Check the condition of the flush valve, tank ball and lift wires or flapper and chain along with the handle assembly. This is the point of no return, so here’s the time when you might want to discuss the potential repair costs versus replacement costs for a new water closet. It is not unusual for repair costs to exceed replacement costs if too many major components need replacing.
Aside from needing a new tank ball and lift wires, our problem today is the leak emanating from a worn out flush ell. While you could remove the tank by disconnecting the water, flush ell and rusted tank support bolts, your attempts will often ruin the plastered wall housing the bolts and you’d be buying into a host of potential problems! Check the two slip joint nuts to see if they’ll turn off easily. When doing this, it is desirable to back-hold the spud or flush valve exposed threads with a second set of pliers to prevent disturbing their gaskets, which will lead to more leaks and frustration. If there aren’t enough bare threads to enable back-holding these items, you can cut the slip joint nuts with a small hacksaw. Start the cut at a sharp angle — roughly 45 degrees off of vertical — and cut through the shoulder first. Follow along the side until you “feel” the change in resistance caused by the softer brass threads of the spud or valve. A flat blade screwdriver can be used to pry apart and snap the remaining male threads of the runner nut. Do the same, if necessary, to the second runner nut. Tear off, cut or gently chip away the hardened slip joint washer.
Now the fun begins! Before you proceed further, gather together the tools and materials needed to complete this repair. Why? Because I’m going to have you sit on the bowl, facing the wall to give support to the tank with your knees and you won’t be able to leave that position until this job is finished. (Remember those rusted bolts?) Put the seat and lid down first or you’ll be working by touch only! Aside from the two pairs of pliers, hacksaw, 4-way screwdriver, knife, measuring tape, large tubing cutter and tin snips, you’ll want the replacement 2x6x8 chrome flush ell with new runner nuts, a ball of wick yarn and a can of heat-proof grease. Wick yarn is fine thread cotton candle wicking available from most local supply houses and if this job really goes south, you can go into business making candles from discarded wax closet gaskets.
What you’ll next discover is that the old flush ell will not slip out of the openings at either the spud or flush valve because it is too long. If you’re lucky, your tubing cutter will have enough room for a full swing. You might find it necessary to gently lift the tank with your knees so that you can easily remove the flush ell pieces. If not, use the hack saw to do the job, cutting on a slight angle to facilitate swinging or sliding the two pieces away from each other. With the old flush ell removed, you’re ready to install the new one. I prefer using one-piece flush ells and they’re not difficult to install if you use the following tips.
You’ll need to cut both ends of the flush ell in order to pull this off and, in all likelihood, you’ll be doing this several times before a good fit can be achieved. Insert the flush ell into the tank’s flush valve roughly a 1/2 inch and measure how much you’ll need to cut off the opposite end to ensure at least 1/2 inch entry into the spud. It’s tough to judge how level you’re holding the flush ell from this contorted position, so you might want to leave a little extra for trimming. If necessary, and it often is, do the same with the opposite end. This first cut will work well using your large tubing cutter, but the fine trimming will see the cutting wheel track right off the edge of the tube. Here’s where your right or left cutting tin snips come into play and make sure they’re your snips and not the mechanic’s from the sheet metal shop! The flush ell brass tubing can be trimmed using your snips and you can keep checking for a fit between the flush valve and closet spud. There’s enough play in both joints to cock the flush ell at an angle while inserting the ell into the joints.
Did we forget the rubber slip joint washers? Nope, throw them away! Why? Because experience taught me long ago that the odds of getting a water-tight seal are stacked against me if I use the rubber washers provided, and that using them increases the odds of creating a leak at the valve or spud washers because of the torque required to obtain that seal. Instead, pull off about a three-foot piece of the wick yarn, cut or tear it off and draw it through the heat-proof grease. Work the grease into the strands by pulling the wicking through your fingers while working them back and forth across the threads. Wrap the wick yarn onto the flush ell like a tightly wound spring. Do this in the same direction the nut will turn so it can’t unravel under the runner nut. Run the nut down onto the threads and snug it up with your pliers. Wipe away the excess grease, clean up and restore operation.
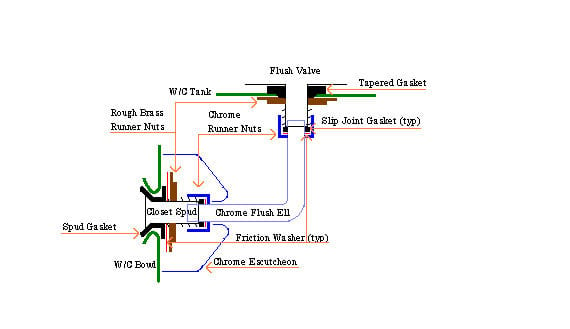
ENLARGE
FIGURE 1
ENLARGE
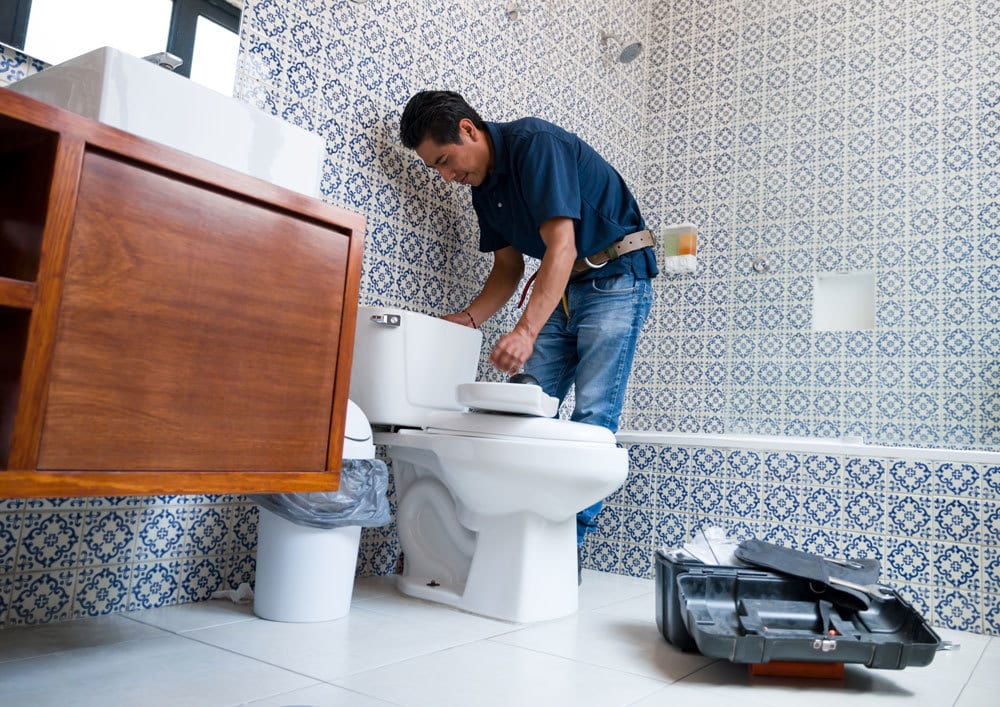
andresr/Getty Images Plus via Getty Images. Figures courtesy of Dave Yates
This article was originally published in Plumbing & Mechanical in September 2017.